Wrist Arthroscopy Pearls
By Antony Hazel, MD
In the age of explorers, individuals embarked on great voyages that spanned the globe, redefining what was possible. Their expeditions were inspired by myths, and they were committed to confirming the tales that they had heard with their own eyes. In a similar manner, I had set off to Spain early in my practice. I had heard and read about the advances that Dr. Francisco del Piñal in Spain had made with wrist arthroscopy, including arthroscopically assisted distal radius fracture fixation and arthroscopic four corner fusion. Wrist arthroscopy is analogous to a game of Jenga, where a series of decisions can lead to either success or failure. While in Spain, I learned how critical preoperative planning was for arthroscopy with all of the moving parts involved. The following describes the pearls that I learned from my time abroad which I have incorporated into my practice.
First, the positioning begins with the upper extremity placed on the hand table. The arm is secured to the table before prepping with tape to counteract traction. After prepping, the hand and wrist are suspended using the shoulder arthroscopy lateral positioner which is connected to a device that pulls traction through all five digits via a carabiner type clamp with figure 8 clamp and another carabiner clamp (Figure 1). The advantage of this is that the hand and wrist are stable, not requiring a second of hand to steady a wrist arthroscopy tower. Also, the hand can be disconnected and reconnected as needed using the carabiner system to maintain sterility.

(Figure 1)
The amount of traction used in Spain differed greatly. During my surgical training, the amount of traction used for arthroscopy always ranged between 12-15 pounds. In Spain, they use 12-15 kilograms (26-33 pounds) which provides much better visualization, thus allowing for easier instrumentation and more complex procedures. Figure 2 demonstrates an intra-articular distal radius malunion take down with an osteotome. Figure 3 demonstrates an intra-articular distal radius fracture before and after reduction. The arthroscopy is performed in a dry manner with only a small of saline used for irrigation of debris or blood and while shaving or burring.
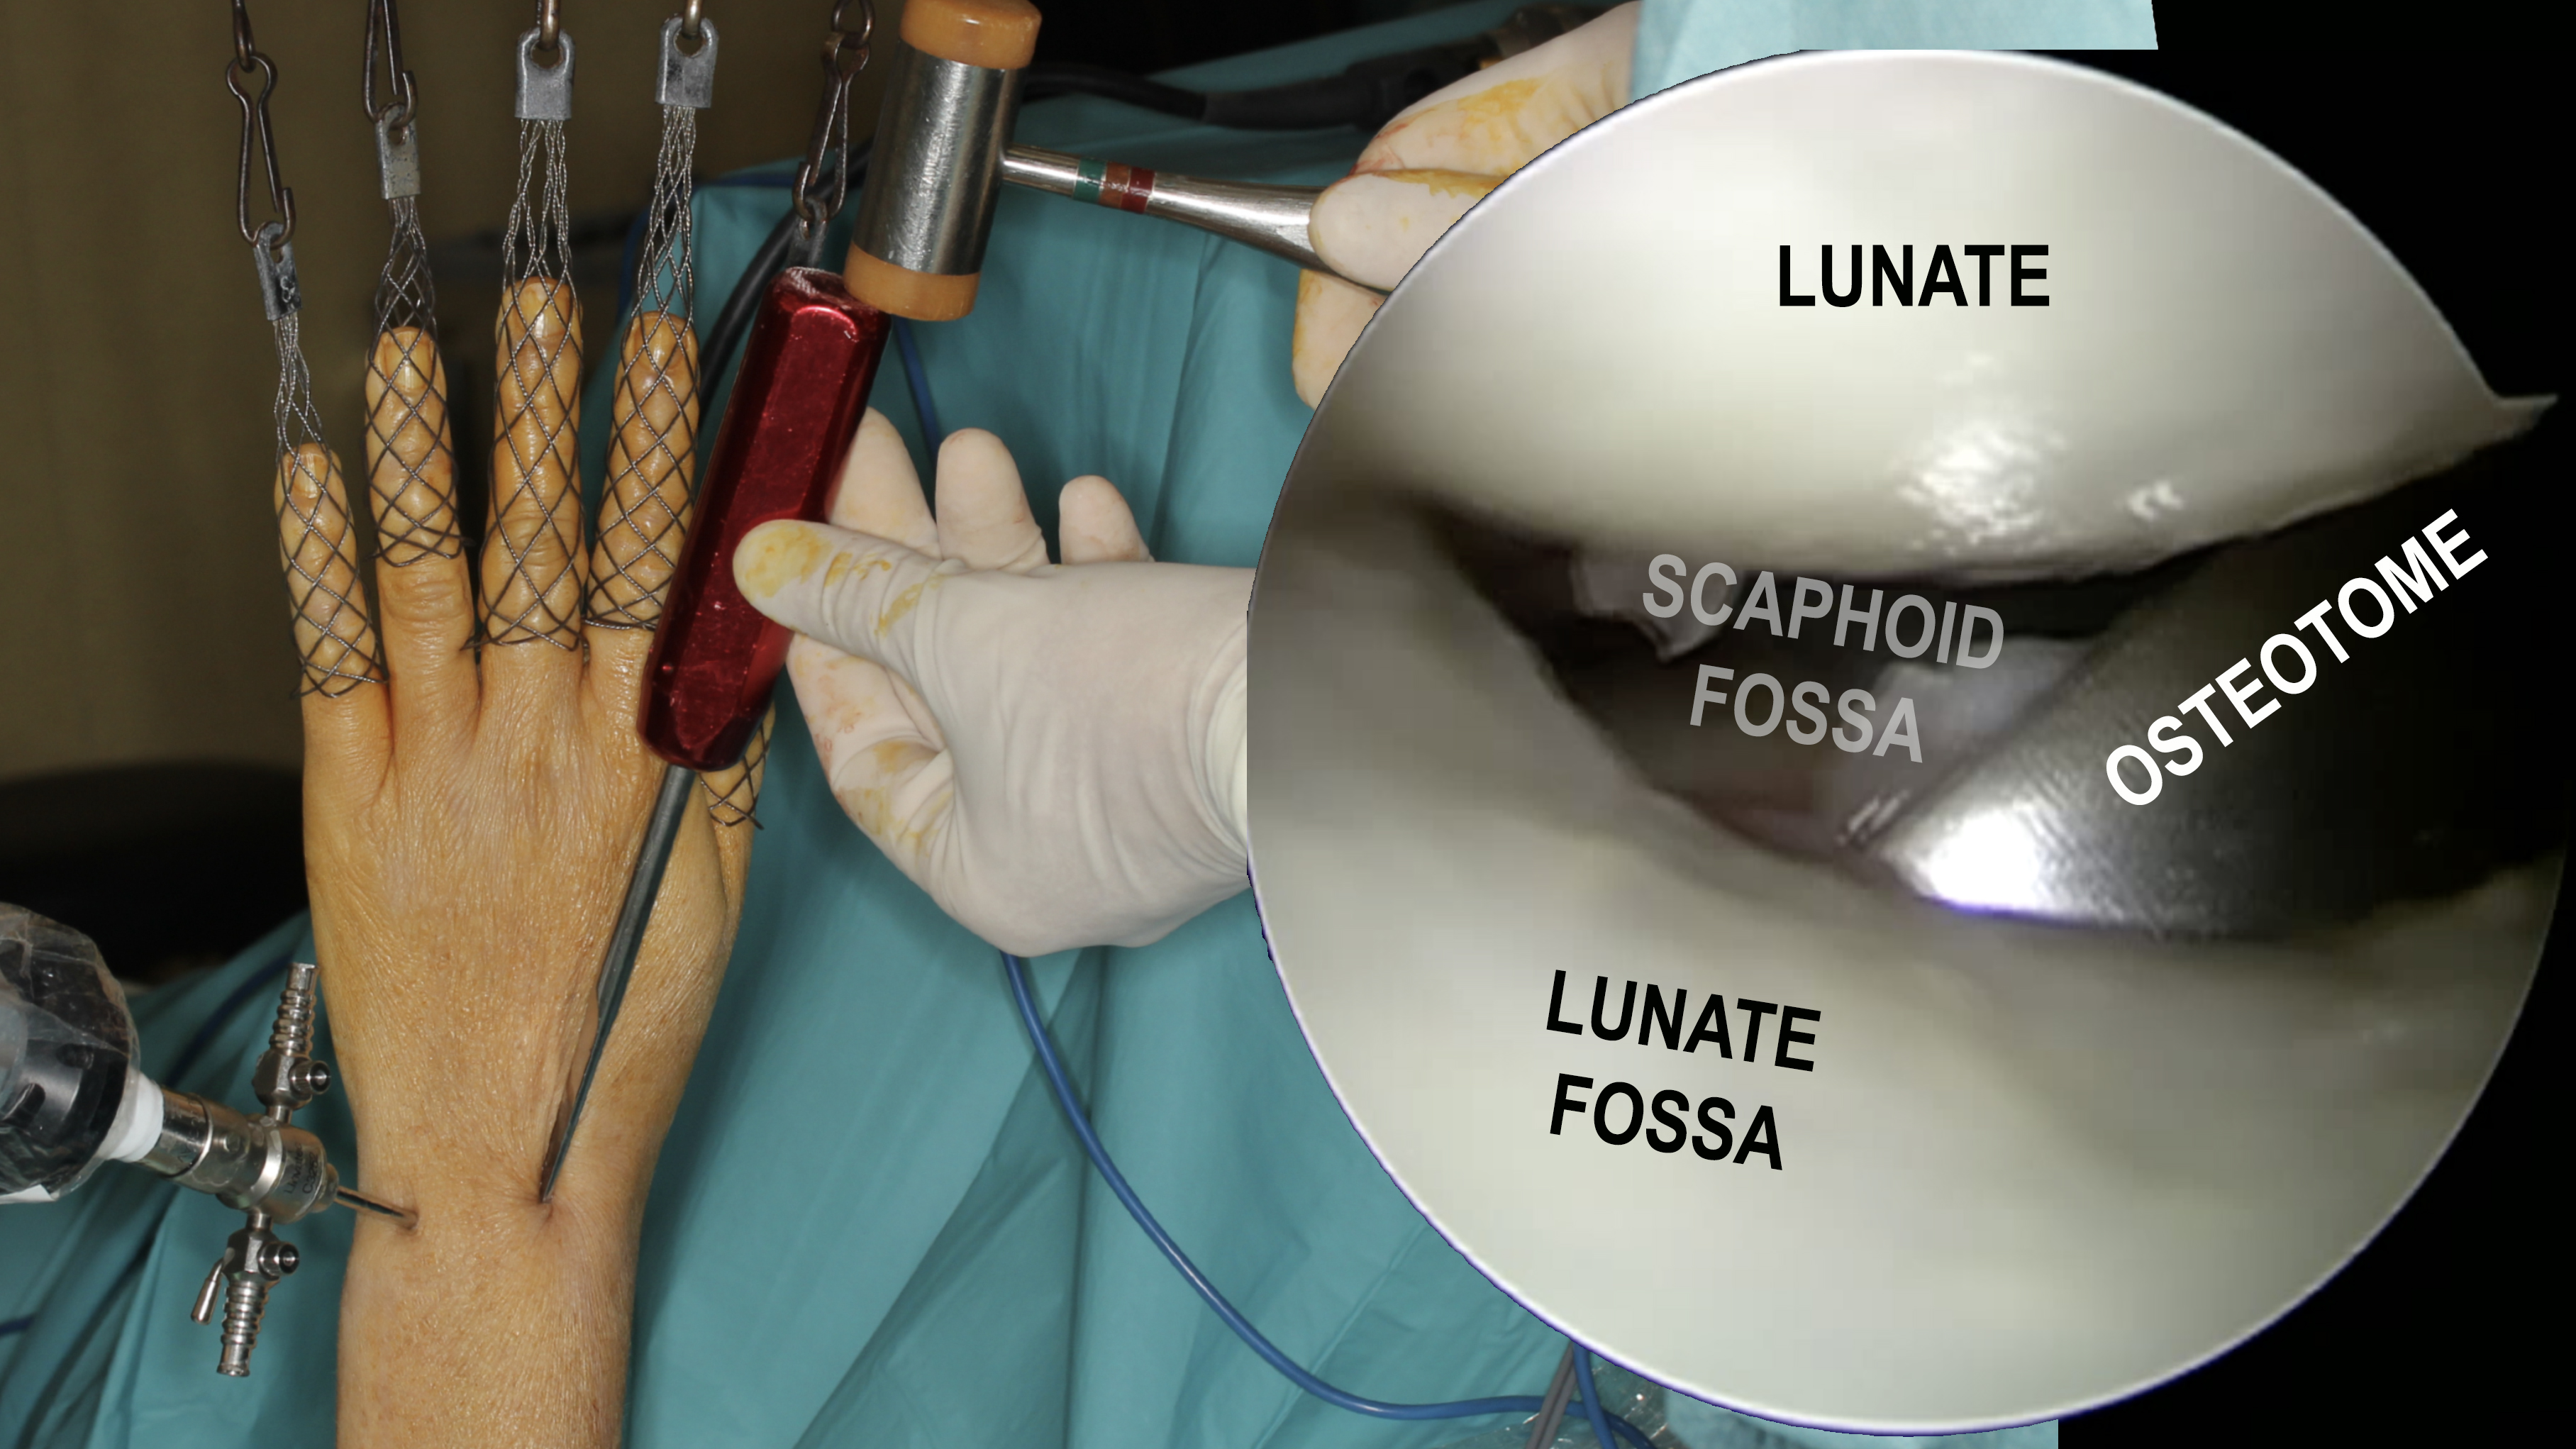
(Figure 2)
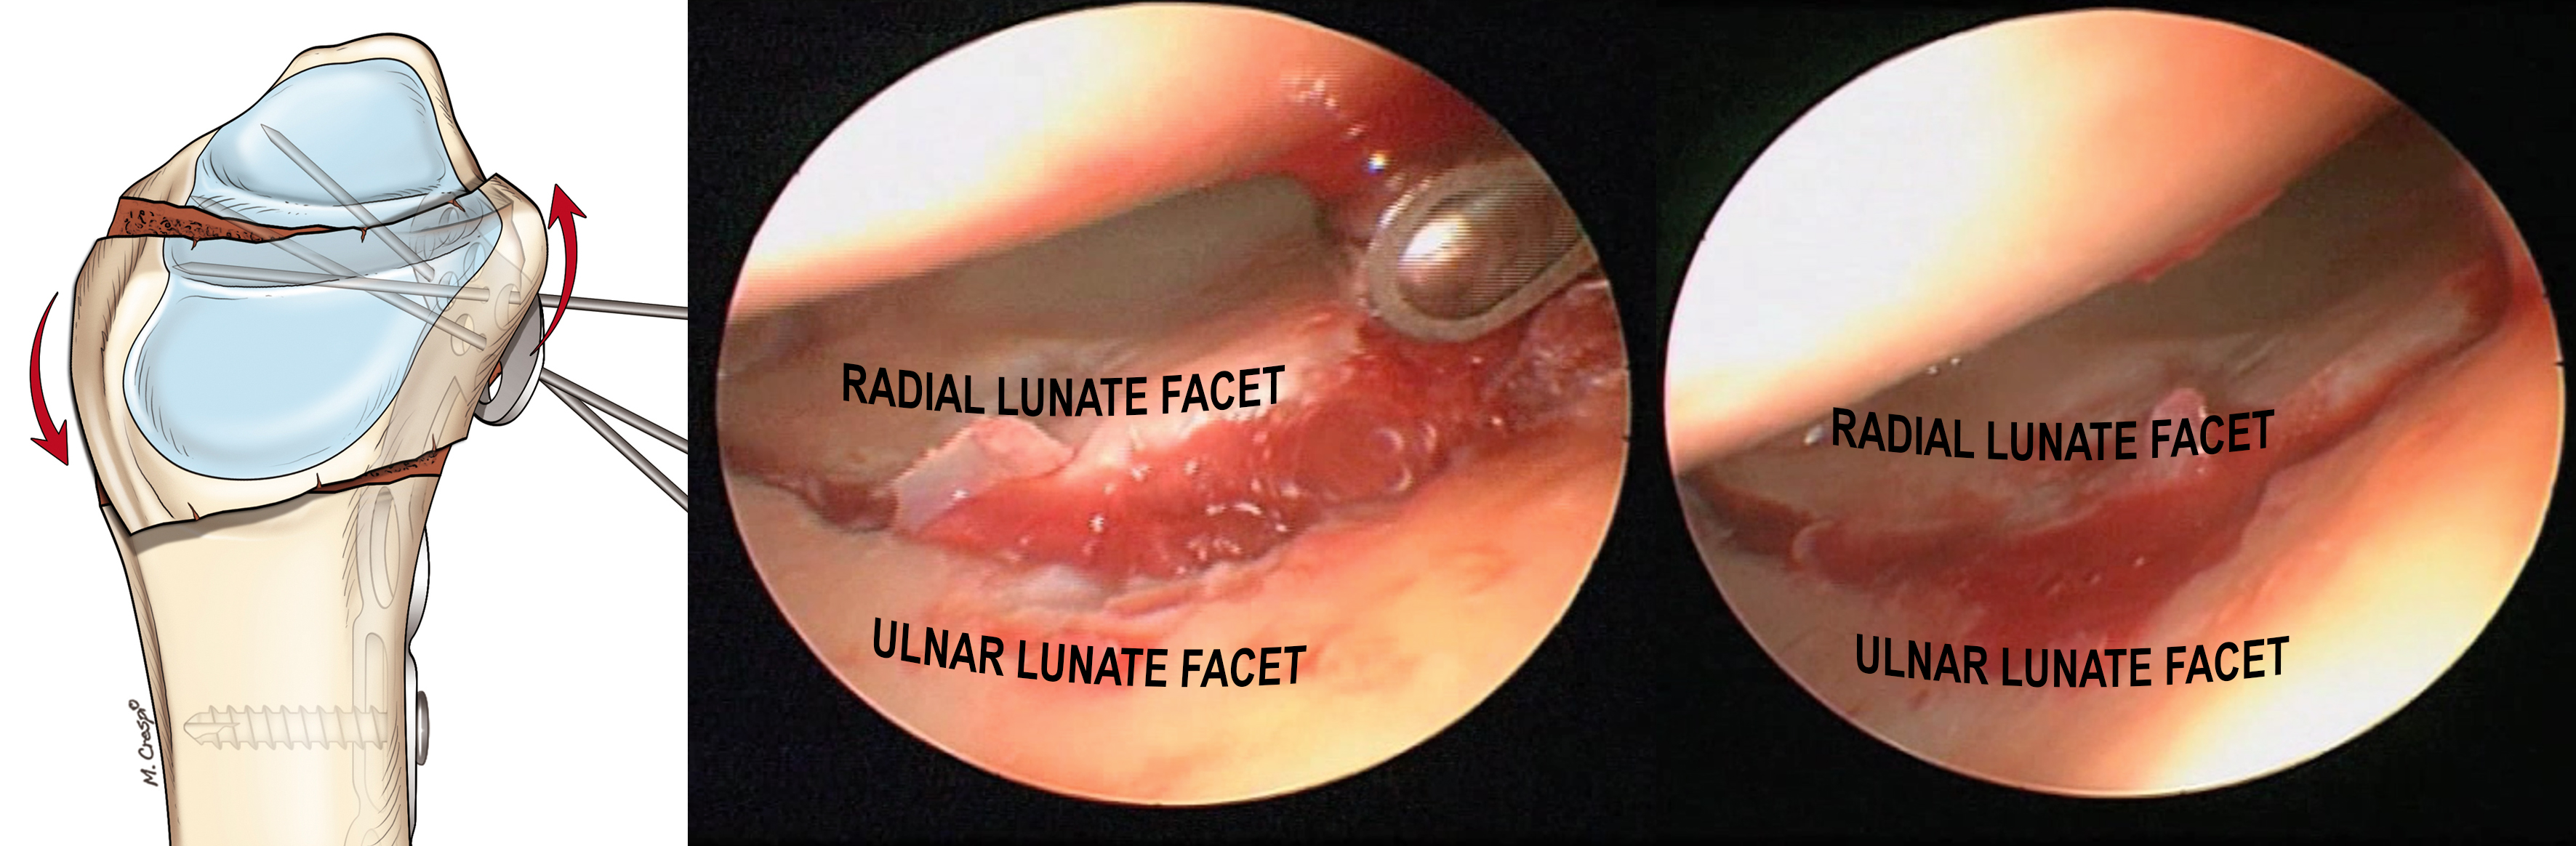
(Figure 3)
Post operatively, the patients do not show any ill effects from the increased traction. I have been able to incorporate this setup into my own practice which has aided in visualization and instrumentation. For a more thorough description of the above setup, procedures or other helpful surgical pearls, I highly recommend Dr. Piñal’s recently published book entitled Atlas of Distal Radius Fractures. I would also like to thank Dr. Piñal for the above figures and his continued guidance.